Xbox Controller Repair: Fix Drift, Bumpers, and Buttons
Xbox controller repair means fixing one worn part, a drifting stick, a dead bumper, a sticky button, or a weak trigger, instead of the whole pad. Diagnose the fault in a browser tester first, then repair to the fault rather than to a guess.
What breaks on an Xbox pad, how to confirm the fault in 30 seconds, how to open it, and when to repair versus replace.
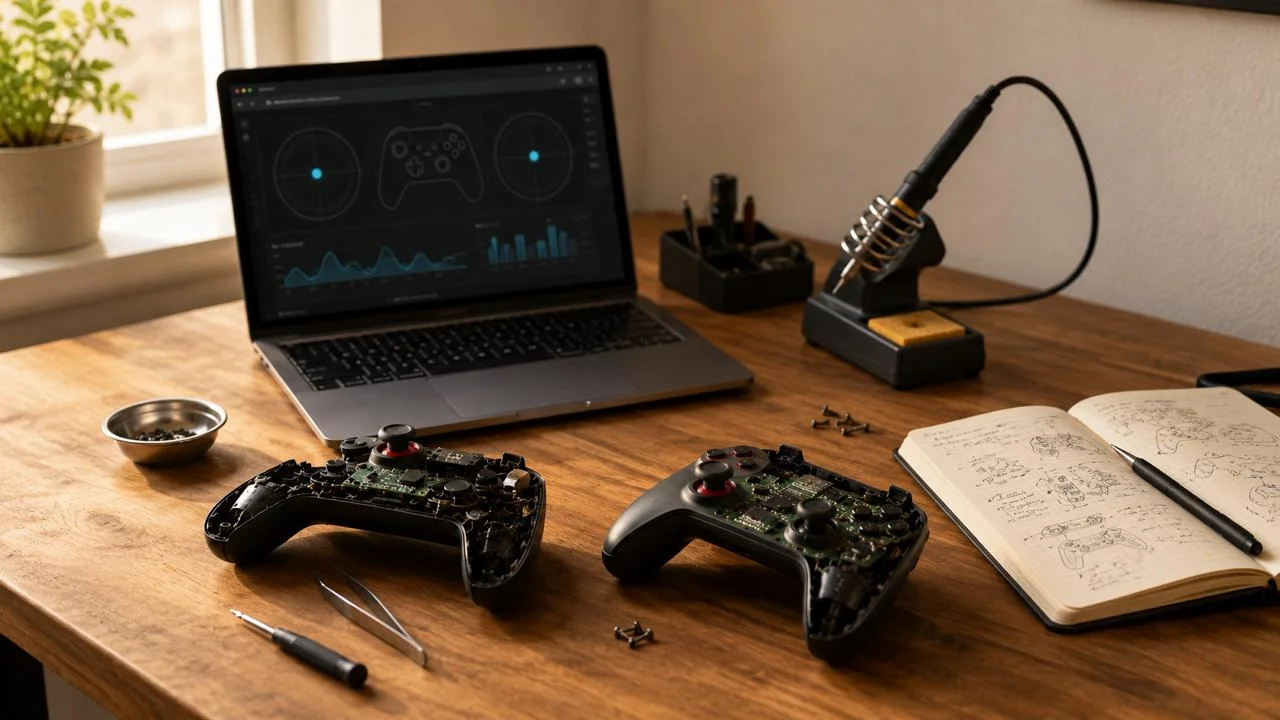
Xbox controller repair means fixing the one worn part inside the pad, a drifting stick, a dead bumper, a sticky button, or a weak trigger, instead of binning the whole controller. Most Xbox faults are a single part, and most can be confirmed before you order anything.
The mistake almost everyone makes is buying parts before they know what is broken. A two-minute test settles it. Rest the controller flat in a controller tester and watch what the hardware actually reports, then repair to the fault instead of to a guess.
Key takeaways
- Most Xbox faults are one worn part: a stick module, a bumper switch, a rubber contact pad, a trigger spring, or a thumbstick cap.
- Diagnose before you buy. A browser tester reads the Gamepad API and confirms drift, a dead bumper, a sticky button, or a weak trigger in about 30 seconds.
- An Xbox Wireless Controller opens with a Torx T8 driver: four screws under the side grips plus one hidden under the battery-compartment sticker.
- A Hall-effect stick module uses magnets instead of a wearing contact pad, so it ends drift for good, but it needs soldering.
- Repair a single cheap fault if you own the tools; multiple faults, a cracked board, or water damage point to a replacement instead.
◆ VERIFIED
The Xbox Wireless Controller is a serviceable pad. iFixit publishes a full teardown documenting the disassembly order, the Torx T8 security screws, the four screws under the side grips, the fifth screw hidden under the battery-compartment sticker, and the ribbon cables inside. Its drift-prone sticks are carbon-track potentiometer modules, the same wear-prone design behind analog drift across the controller industry [1].
Skip the reading: diagnose it in 30 seconds
- Open JoyCheck or any browser-based gamepad tester in Chrome, Edge, or Firefox.
- Connect the Xbox controller over a USB cable, or pair it over Bluetooth, then press any button to wake the Gamepad API.
- For drift: set the controller flat on a table, hands off both sticks, and watch the on-screen stick positions. They should read near zero.
- For buttons and bumpers: press every face button, the D-pad, LB, RB, and click both sticks. Each should light its indicator once and release cleanly.
- For triggers: pull LT and RT slowly to the stop. The pressure bar should travel from 0 to full and back.
What breaks most often on an Xbox controller?
The most common Xbox Wireless Controller failures are, in rough order: analog stick drift, a bumper that stops clicking, sticky or dead face buttons, a worn trigger, and a loose thumbstick cap. Each maps to a specific part with its own cost and difficulty, so naming the fault is the first real step of any repair.
| Symptom you notice | Likely Xbox part | Browser tester can confirm? | Repair difficulty |
|---|---|---|---|
| Aim or character moves on its own | Analog stick module (potentiometer) | Yes, at-rest stick value is non-zero | Soldering, or a Hall-effect swap |
| LB or RB feels dead or does nothing | Bumper actuator or tact switch | Yes, the bumper does not register | Clip-in actuator, solder the switch |
| A face button needs hard presses | Conductive rubber contact pad | Yes, the button does not light | No solder, clip-in |
| Trigger is weak or will not reach full | Trigger spring or sensor | Yes, the trigger bar misbehaves | Low, some solder |
| D-pad sticks in one direction | D-pad rubber membrane | Yes, the direction stays lit | No solder, clip-in |
| Thumbstick cap is loose or torn | Stick cap (cosmetic) | No, the signal is fine | None, pull and replace |
| Pad will not power on from AA cells | Battery contacts or spring | No, the pad never connects | No solder, clean or bend |
| Weak or no rumble | Rumble motor | No, the API cannot read rumble | Solder |
Notice the right two columns. Five of these faults are electrical and a browser tester sees them directly. Three of them, the AA contacts, rumble, and a cosmetic cap, sit outside what the Gamepad API can read, so they need your eyes and hands. If the pad will not connect at all, that is the Xbox controller not detected guide, not a parts problem, and battery-life faults belong in the controller battery and charging guide.
How do you fix Xbox controller stick drift?
You fix Xbox stick drift by cleaning the potentiometer module with contact cleaner, or by replacing the stick module entirely. Cleaning buys time, but the carbon track keeps wearing, so drift usually returns within weeks. A replacement module is the lasting fix, and a Hall-effect module ends the cause for good because it has no contact pad to wear.
Start by confirming the drift is real. Rest the stick and read its at-rest value in the deadzone tester; a number that sits away from center is drift, not your imagination.
Replacing the module means desoldering the old one and seating the new one, so it is the hardest common Xbox repair. If you would rather not solder twice, the wider stick drift fix guide covers cleaning, firmware, and recalibration before you reach for the iron.
Why do the bumpers (LB and RB) stop clicking?
Xbox bumpers stop clicking for two reasons: the small plastic actuator that presses the switch cracks, or the tact switch underneath it wears out. The bumper is one of the most common Xbox controller faults, because that thin plastic arm takes the full force of every press over years of play. Both parts are cheap and replaceable.
Test it first. In the tester, press LB and RB and watch whether each registers; a bumper that never lights up has a broken actuator or a dead switch beneath it.
The actuator is a clip-in part you can swap with no soldering. The tact switch is soldered to the board, so replacing it needs an iron, but the switches themselves cost very little.
How do you open an Xbox controller to repair it?
You open an Xbox Wireless Controller with a Torx T8 security screwdriver. Four screws hide under the two side grips, and a fifth sits concealed under the sticker inside the battery compartment. Peel that sticker, remove all five screws, then gently pry the front and back shells apart at the seam near the bumpers [1].
Work slowly once the shell is loose. Thin ribbon cables connect the triggers and the front board, and a torn ribbon turns a simple repair into a much larger one [2].
Keep the five screws somewhere safe and note that the side-grip screws are reached by easing the textured panels off first. There is no glue, only clips and screws, so steady patience opens the pad cleanly.
Can you repair an Xbox controller without soldering?
Yes, several Xbox repairs need no soldering at all. Sticky face buttons, a stuck D-pad, a cracked bumper actuator, a worn thumbstick cap, and dirty battery contacts are all clip-in or clean-only fixes. Soldering is only required for the analog stick module, the bumper tact switch, and the rumble motors, which are wired directly to the board.
That split decides your first repair. A dead button or a loose stick cap is a confident no-solder starting point, and you can finish it with a Torx driver and a pry tool.
Drift is the opposite case. It is the most common Xbox fault and also the one that needs an iron, so a first-time fixer often pairs a drift repair with learning to solder a clean joint.
Should you repair or replace your Xbox controller?
Repair when the pad has a single, cheap, well-understood fault and you own or will buy the tools. Replace when it has several faults at once, a cracked board, or water damage, because those stack past the price of a new controller. Diagnose the exact fault first, count how many there are, then price the part against your time.
| Fault | Typical fix | Solder needed? | Rough part cost | Verdict |
|---|---|---|---|---|
| Stick drift, one stick | Replace module, or Hall-effect | Yes | Low | Repair if you solder |
| Dead bumper | Actuator or tact switch | Switch only | Low | Repair |
| Sticky button or D-pad | Rubber contact pad | No | Low | Repair |
| Weak trigger | Spring or sensor | Sometimes | Low | Repair |
| Two or more faults at once | Several parts plus time | Often | Adds up | Lean replace |
| Cracked board or water damage | Board-level or none | Heavy | High | Replace |
The honest version of this math is about your tools and your time, not just the sticker price of a part. A stick module costs little, but it needs soldering, so the first drift repair also buys an iron and the half hour to learn the joint. If you already solder, repair wins easily; if you do not, a clip-in fix is the better first project. The same diagnose-first logic runs the PS4 controller repair guide for Sony pads.
Does Microsoft cover Xbox controller repair under warranty?
Xbox controllers carry a limited warranty, and within it Microsoft will repair or replace a faulty pad once you submit the serial number and proof of purchase. Out of warranty, the service carries a fee that often lands close to the price of a new pad. Microsoft extended the Elite Series 2 warranty to a year after drift complaints [3].
Check the warranty before you reach for a screwdriver. Opening the controller breaks the warranty seal in the battery compartment, which voids any remaining cover, so a pad still in warranty should go back to Microsoft rather than onto your bench.
If the warranty has lapsed, the math flips. A self-repair on a single fault almost always beats the out-of-warranty service fee, which is why diagnosing the exact part matters so much.
Are Hall-effect sticks worth it to stop drift coming back?
Hall-effect sticks are worth it if you are tired of drift returning. No first-party Xbox stick is drift-proof, because they all use carbon contact pads that wear with use. A Hall-effect module reads position with magnets and a sensor, so there is nothing to physically wear out, and pin-compatible modules drop into the Xbox board [5].
The catch is the install. Hall-effect modules are soldered in like any stick module, so the upgrade is the same difficulty as a standard drift repair, just with a part that should not drift again.
Whether the upgrade earns its place depends on how you play and how often you have replaced sticks already. The Hall-effect versus potentiometer buying guide weighs the cost against the lifespan in full.
How do you confirm the Xbox controller repair worked?
Powering the controller on only proves it turns on, not that the repaired part now reads correctly. After any repair, open the JoyCheck controller tester in a browser, then press every button, pull both triggers, and move both sticks. The part you fixed should register cleanly, and a stick at rest should read near zero [4].
The test runs entirely in the browser through the W3C Gamepad API, the open standard browsers use to read controllers, so nothing installs and nothing is uploaded. Connect the pad, wake it with a button press, and walk through every input one by one.
Pay closest attention to whatever you just repaired. A replaced stick should sit still at rest, a new bumper switch should fire on every press, and a fixed trigger should sweep to full. An input that still fails needs another look, not a reassembled shell.
Sources and references
- iFixit, Xbox One Wireless Controller teardown: disassembly order, Torx T8 screws, the hidden battery-compartment screw, and the internal ribbon cables.
- iFixit, Xbox controller screwdriver guide: confirming the Torx T8 security driver needed to open the pad.
- Xbox support, request a controller replacement: the warranty repair and replacement process, serial number, and proof of purchase.
- W3C Gamepad API specification: how a browser reads controller buttons, sticks, and trigger pressure to confirm a repair.
- iFixit, Xbox One Elite Controller teardown: the seated, swappable analog stick modules behind drift and Hall-effect upgrades.
How do you fix Xbox controller stick drift?
You fix Xbox stick drift by cleaning the potentiometer module with contact cleaner, or by replacing the stick module entirely. Cleaning buys time, but the carbon track keeps wearing, so drift usually returns. A pin-compatible Hall-effect module, which uses magnets instead of a contact pad, removes the cause for good but needs soldering.
What screwdriver opens an Xbox controller?
An Xbox Wireless Controller opens with a Torx T8 security screwdriver. Four screws sit hidden under the two side grips, and a fifth is concealed under the sticker inside the battery compartment. Peel that sticker to reach the last screw before you pry the shell apart.
Why did my Xbox bumper stop clicking?
An Xbox bumper stops clicking when the small plastic actuator that presses the switch cracks, or when the tact switch underneath it wears out. The bumper is one of the most common Xbox faults because that thin plastic arm takes the full force of every press. Both parts are cheap and replaceable.
Can you fix an Xbox controller without soldering?
Yes, several Xbox repairs need no soldering. Sticky face buttons, a stuck D-pad, a cracked bumper actuator, a loose thumbstick cap, and dirty battery contacts are all clip-in or clean-only fixes. Soldering is only needed for the analog stick module, the bumper tact switch, and the rumble motors wired to the board.
Does Xbox repair controllers for free?
Within the limited warranty, Microsoft repairs or replaces a faulty Xbox controller once you submit the serial number and proof of purchase. Out of warranty, the service carries a fee that often lands close to the price of a new controller. Opening the pad yourself voids any remaining warranty.
How do I know if my Xbox controller is worth repairing?
It is worth repairing when the pad has a single cheap fault and you own or will buy the tools. Several faults at once, a cracked board, or water damage tilt toward replacement. Confirm the exact fault in a browser controller tester first, then price the part against your time.
Confirm the fault, then confirm the fix, in 30 seconds
No install, no account. Your inputs never leave your device.